官网下载安装mysql-server
# wget http://dev.mysql.com/get/mysql-community-release-el7-5.noarch.rpm# rpm -ivh mysql-community-release-el7-5.noarch.rpm# yum install mysql-community-server
安装成功后重启mysql服务。
# service mysqld restart
初次安装mysql,root账户没有密码。
[root@yl-web yl]# mysql -u root Welcome to the MySQL monitor. Commands end with ; or \g.Your MySQL connection id is 3Server version: 5.6.26 MySQL Community Server (GPL)Copyright (c) 2000, 2015, Oracle and/or its affiliates. All rights reserved.Oracle is a registered trademark of Oracle Corporation and/or itsaffiliates. Other names may be trademarks of their respectiveowners.Type 'help;' or '\h' for help. Type '\c' to clear the current input statement.mysql> show databases;+--------------------+| Database |+--------------------+| information_schema || mysql || performance_schema || test |+--------------------+4 rows in set (0.01 sec)mysql>
设置密码
mysql> set password for 'root'@'localhost' =password('password');Query OK, 0 rows affected (0.00 sec)mysql> 不需要重启数据库即可生效。
在mysql安装过程中如下内容:
Installed: mysql-community-client.x86_64 0:5.6.26-2.el7 mysql-community-devel.x86_64 0:5.6.26-2.el7 mysql-community-libs.x86_64 0:5.6.26-2.el7 mysql-community-server.x86_64 0:5.6.26-2.el7 Dependency Installed: mysql-community-common.x86_64 0:5.6.26-2.el7 Replaced: mariadb.x86_64 1:5.5.41-2.el7_0 mariadb-devel.x86_64 1:5.5.41-2.el7_0 mariadb-libs.x86_64 1:5.5.41-2.el7_0 mariadb-server.x86_64 1:5.5.41-2.el7_0
三、配置mysql
1、编码
mysql配置文件为/etc/my.cnf
最后加上编码配置
[mysql]default-character-set =utf8
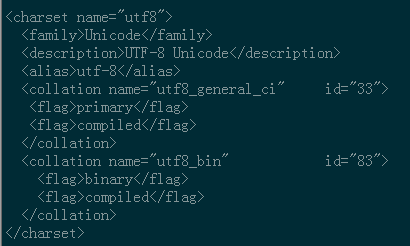
这里的字符编码必须和/usr/share/mysql/charsets/Index.xml中一致。

2、远程连接设置
把在所有数据库的所有表的所有权限赋值给位于所有IP地址的root用户。
mysql> grant all privileges on *.* to root@'%'identified by 'password';
如果是新用户而不是root,则要先新建用户
mysql>create user 'username'@'%' identified by 'password';
此时就可以进行远程连接了。
防火墙配置
防火墙设置一下,不然3306端口还是无法访问。
1 iptables -I INPUT -p tcp -m state --state NEW -m tcp --dport 3306 -j ACCEPT
设置完之后,查看一下是否能通过。
1 iptables -L -n

如果想要限制访问。
iptables -D INPUT -p tcp -m state --state NEW -m tcp --dport 3306 -j ACCEPT
OK,这样就可以远程访问了。
来源:https://www.cnblogs.com/starof/p/4680083.html